My Journey Dye-Sublimating PBT Keycap Legends
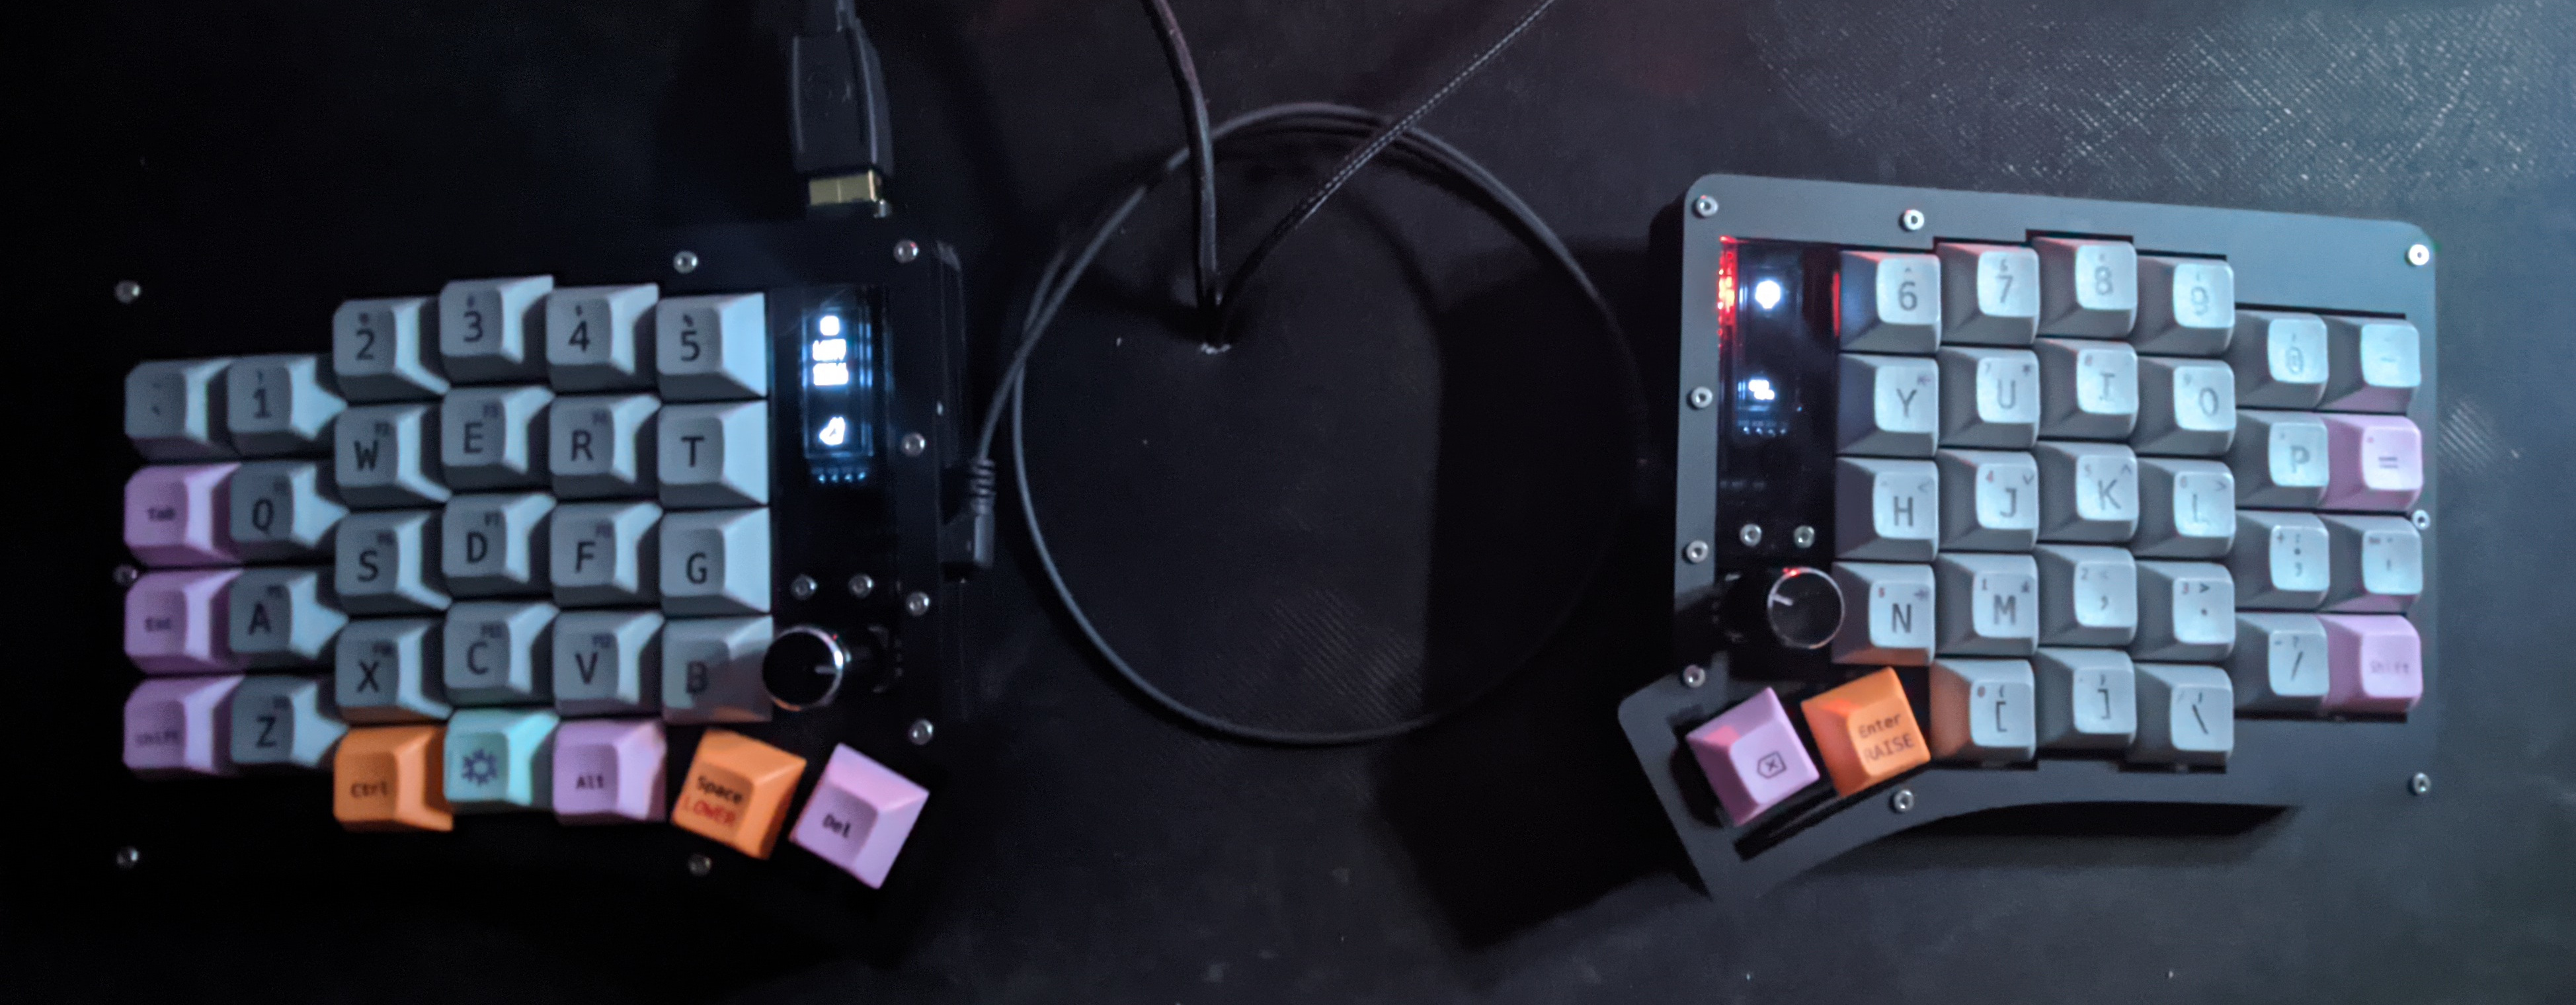
Have you ever looked at your keyboard and felt like something was missing? That was the case for me after I built my Sofle split keyboard. While the sleek and minimalist design appealed to me, the blank keycaps felt bland and uninspiring. That’s when I decided to take matters into my own hands and dye-sublimate custom legends onto my PBT keycaps.
Not only did it add a pop of personality to my keyboard, but it also gave me a fun experience.
Plus I needed to peek into which layer did I put my F12 key (I’m still adjusting to it).
In this post, I’ll share my journey of dye-sublimating PBT keycap legends and the lesson I learned along the way.
What you’ll need
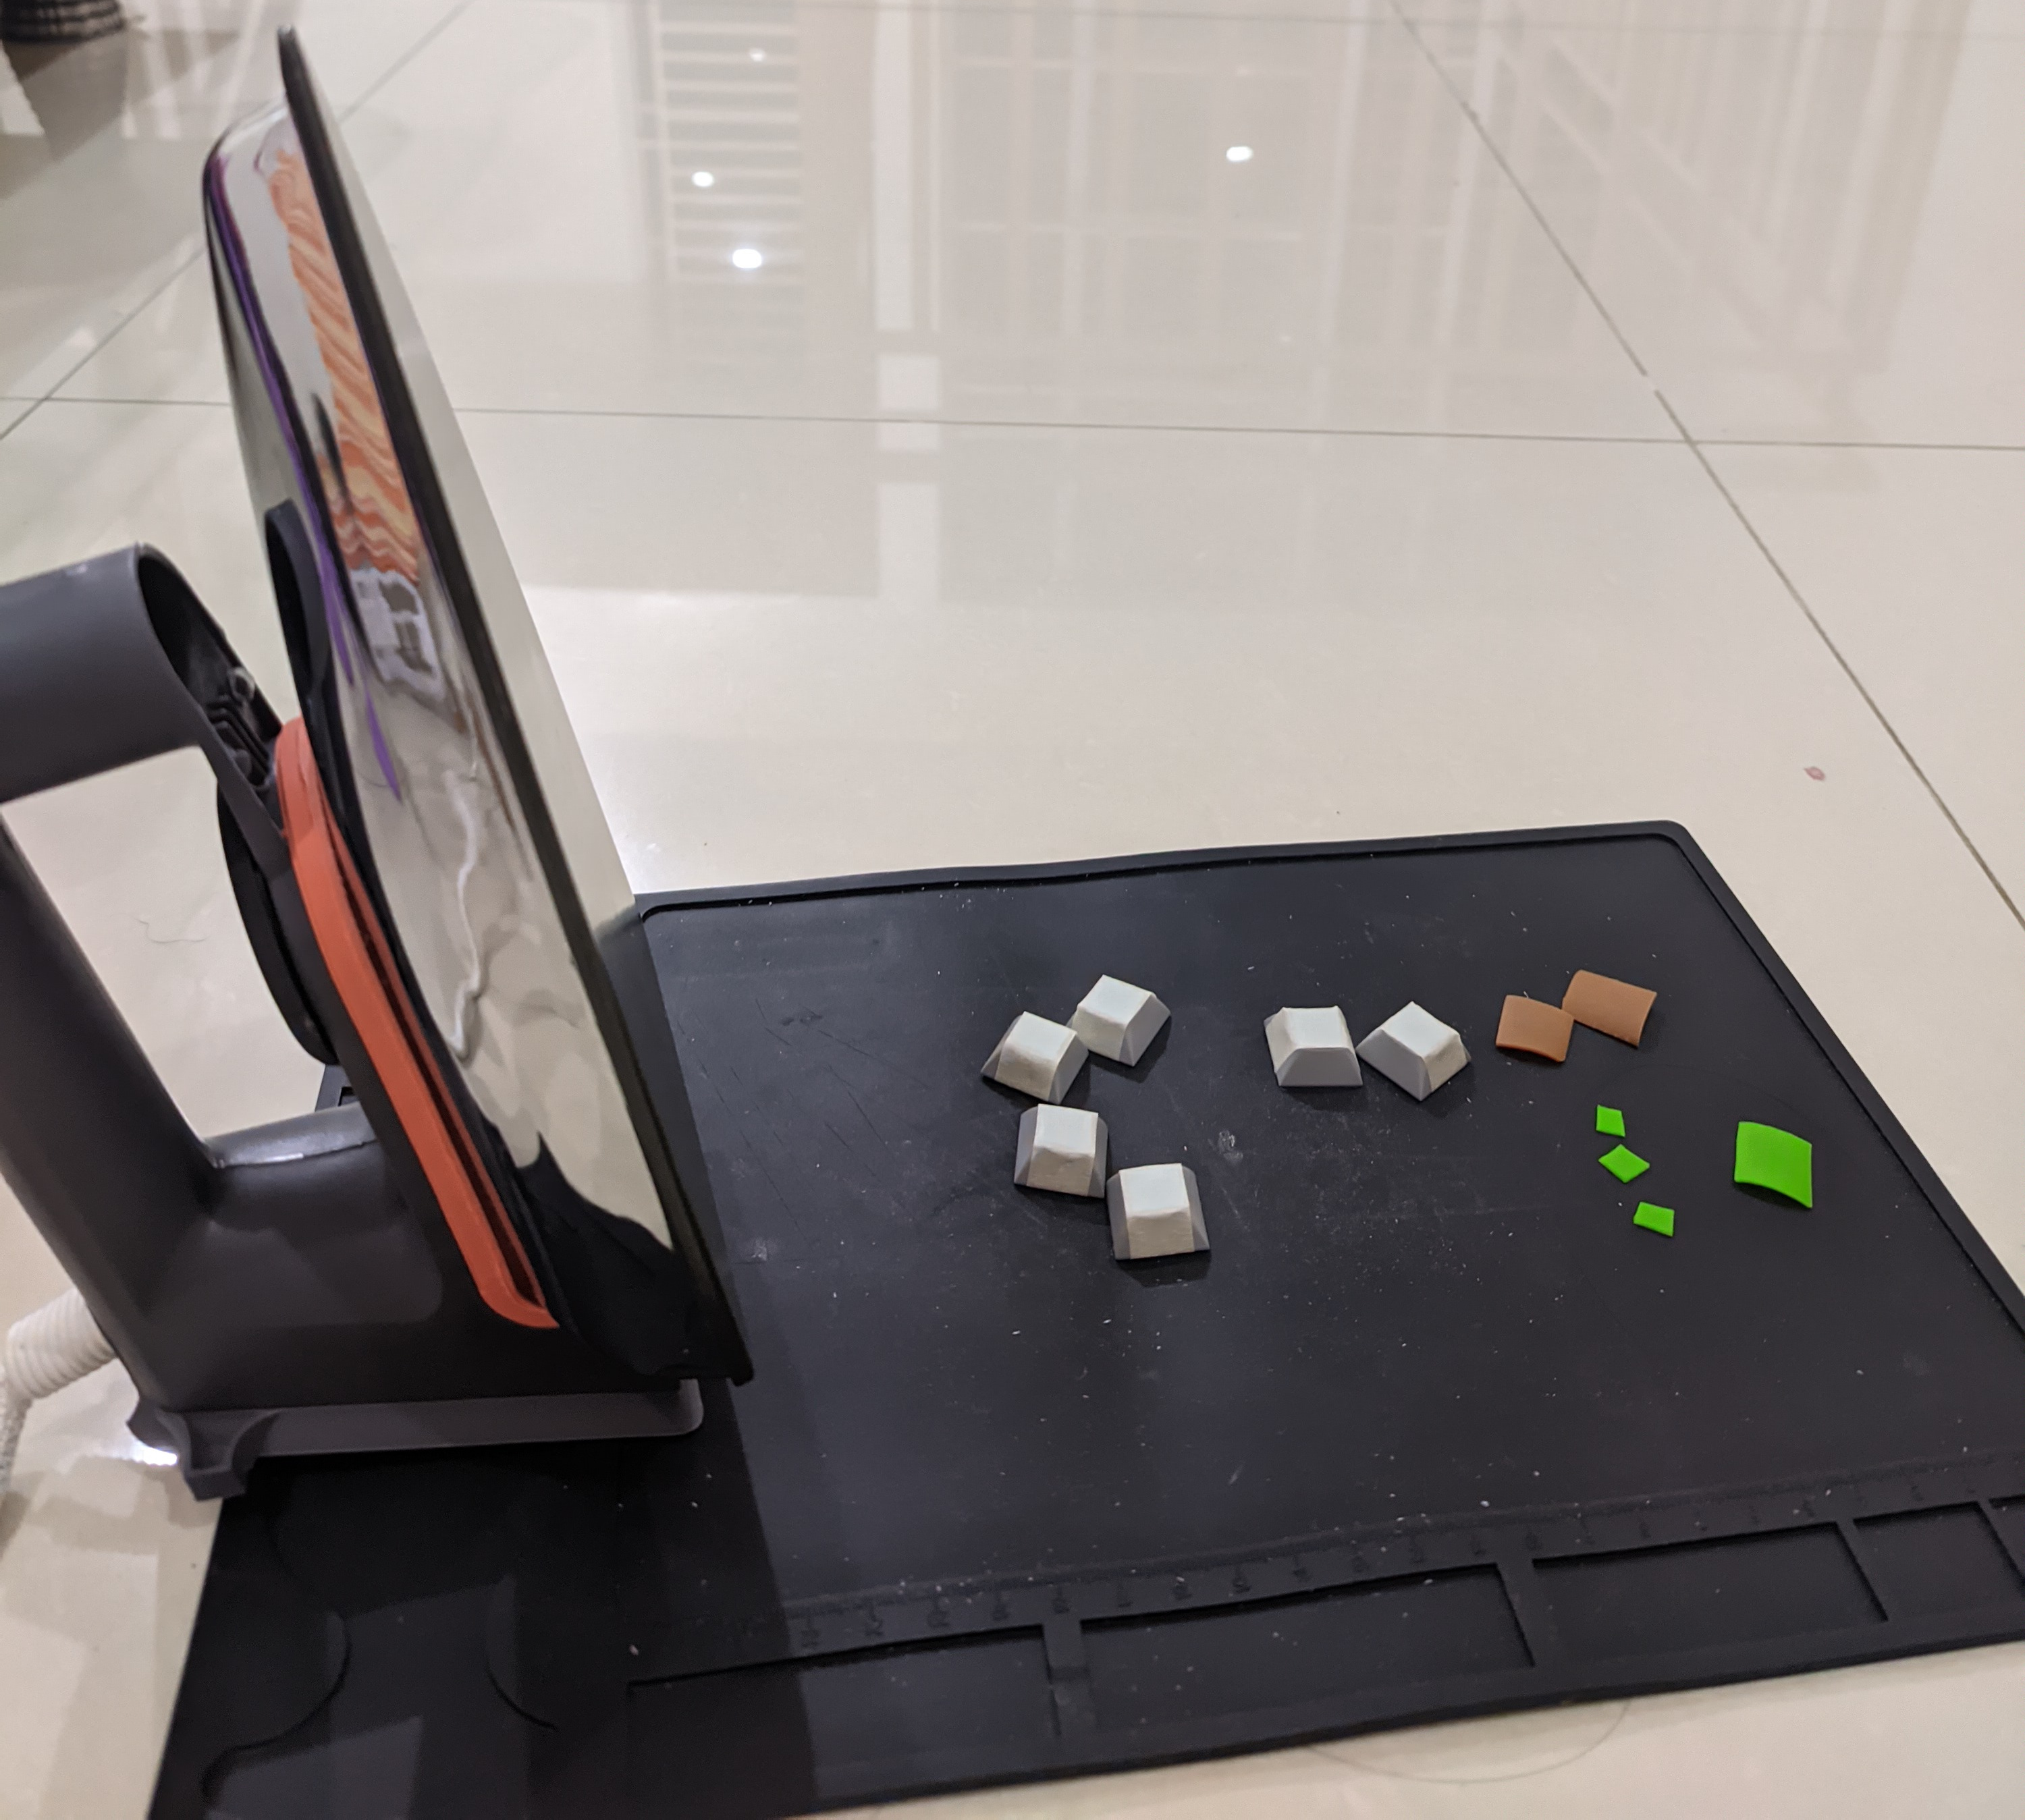
To get started, you’ll need a few supplies:
- A heat transfer paper printed design of your keycap legends.
- Blank PBT keycaps (make sure they’re PBT and not ABS for durability and heat resistance).
- A clothes iron capable of doing 200°C (around 400°F) to transfer the design onto the keycaps.
- Heat resistance tape, I managed to get by using a masking tape to secure the design onto the keycaps.
- Some silicone, I just cut mine from some junks.
- A cutter or pair of scissors to trim the design to fit the keycaps.
- A heat resistance mat (such as a solder mat) to protect your work surface.
Check out the photo below for a visual reference of these supplies. With these tools in hand, you’re ready to start dye-sublimating your own keycap kegends.
Designing the legends
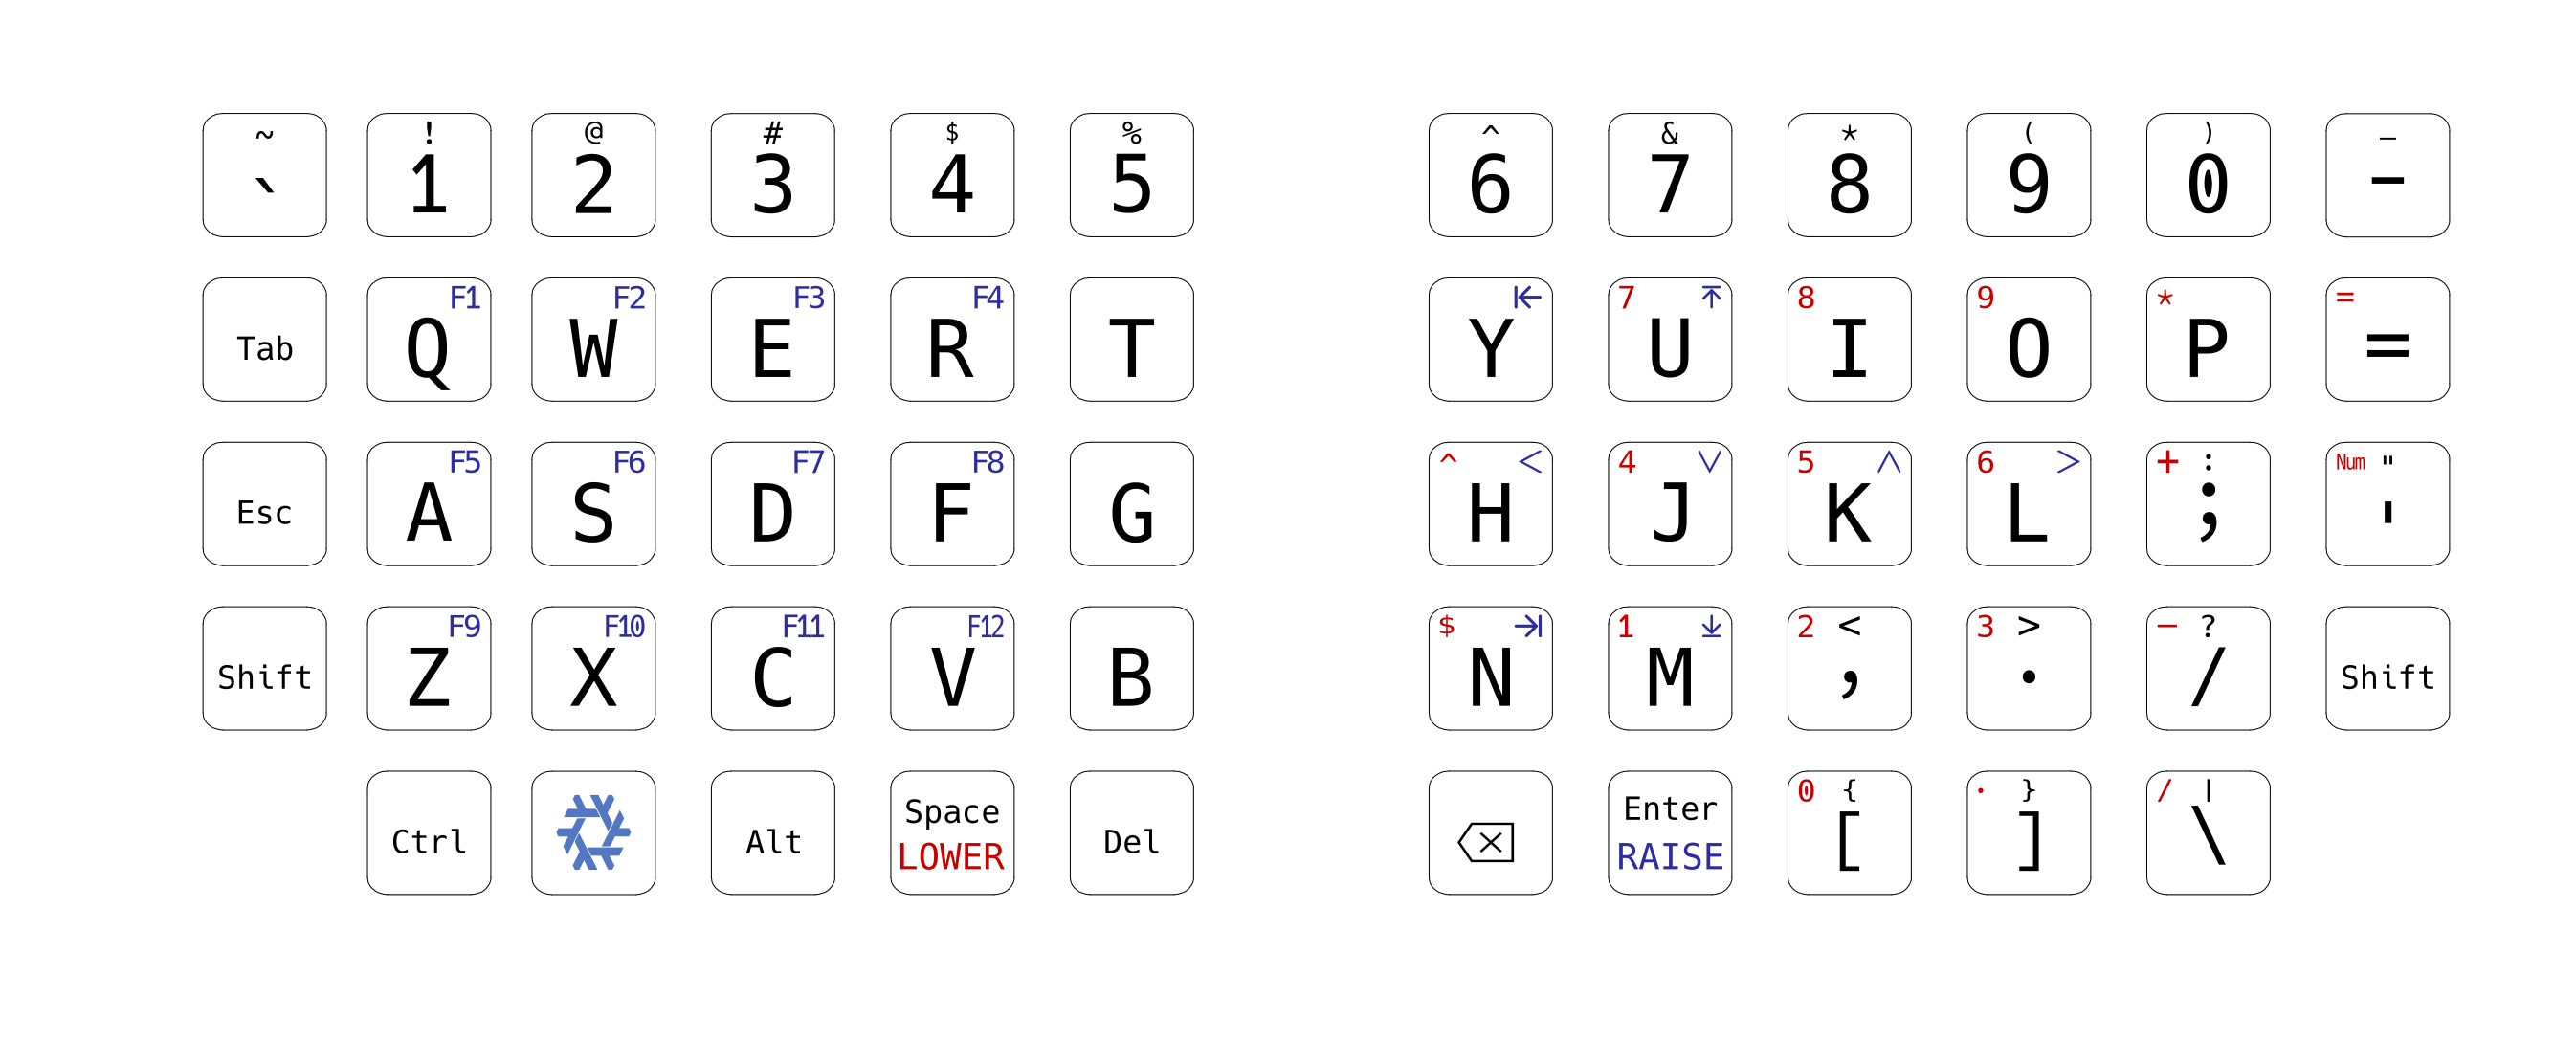
Before you can start dye-sublimating your keycaps, you’ll need to design the legends. I used Inkscape, a free and open-source vector graphics editor, to create my design. Here’s a screenshot of my design:
Once I was happy with my design, I sent the file to a local printing service, where they printed it onto heat transfer paper. This cost me only 6.000 IDR (less than 0.5 USD)!
Here are a few tips I learned from my experience:
- Make sure to add a little bit of space for the keycap outline, so that you don’t accidentally cut the line into the design when trimming it to fit the keycap. I made this mistake on my first attempt and ended up with an ugly result like this:
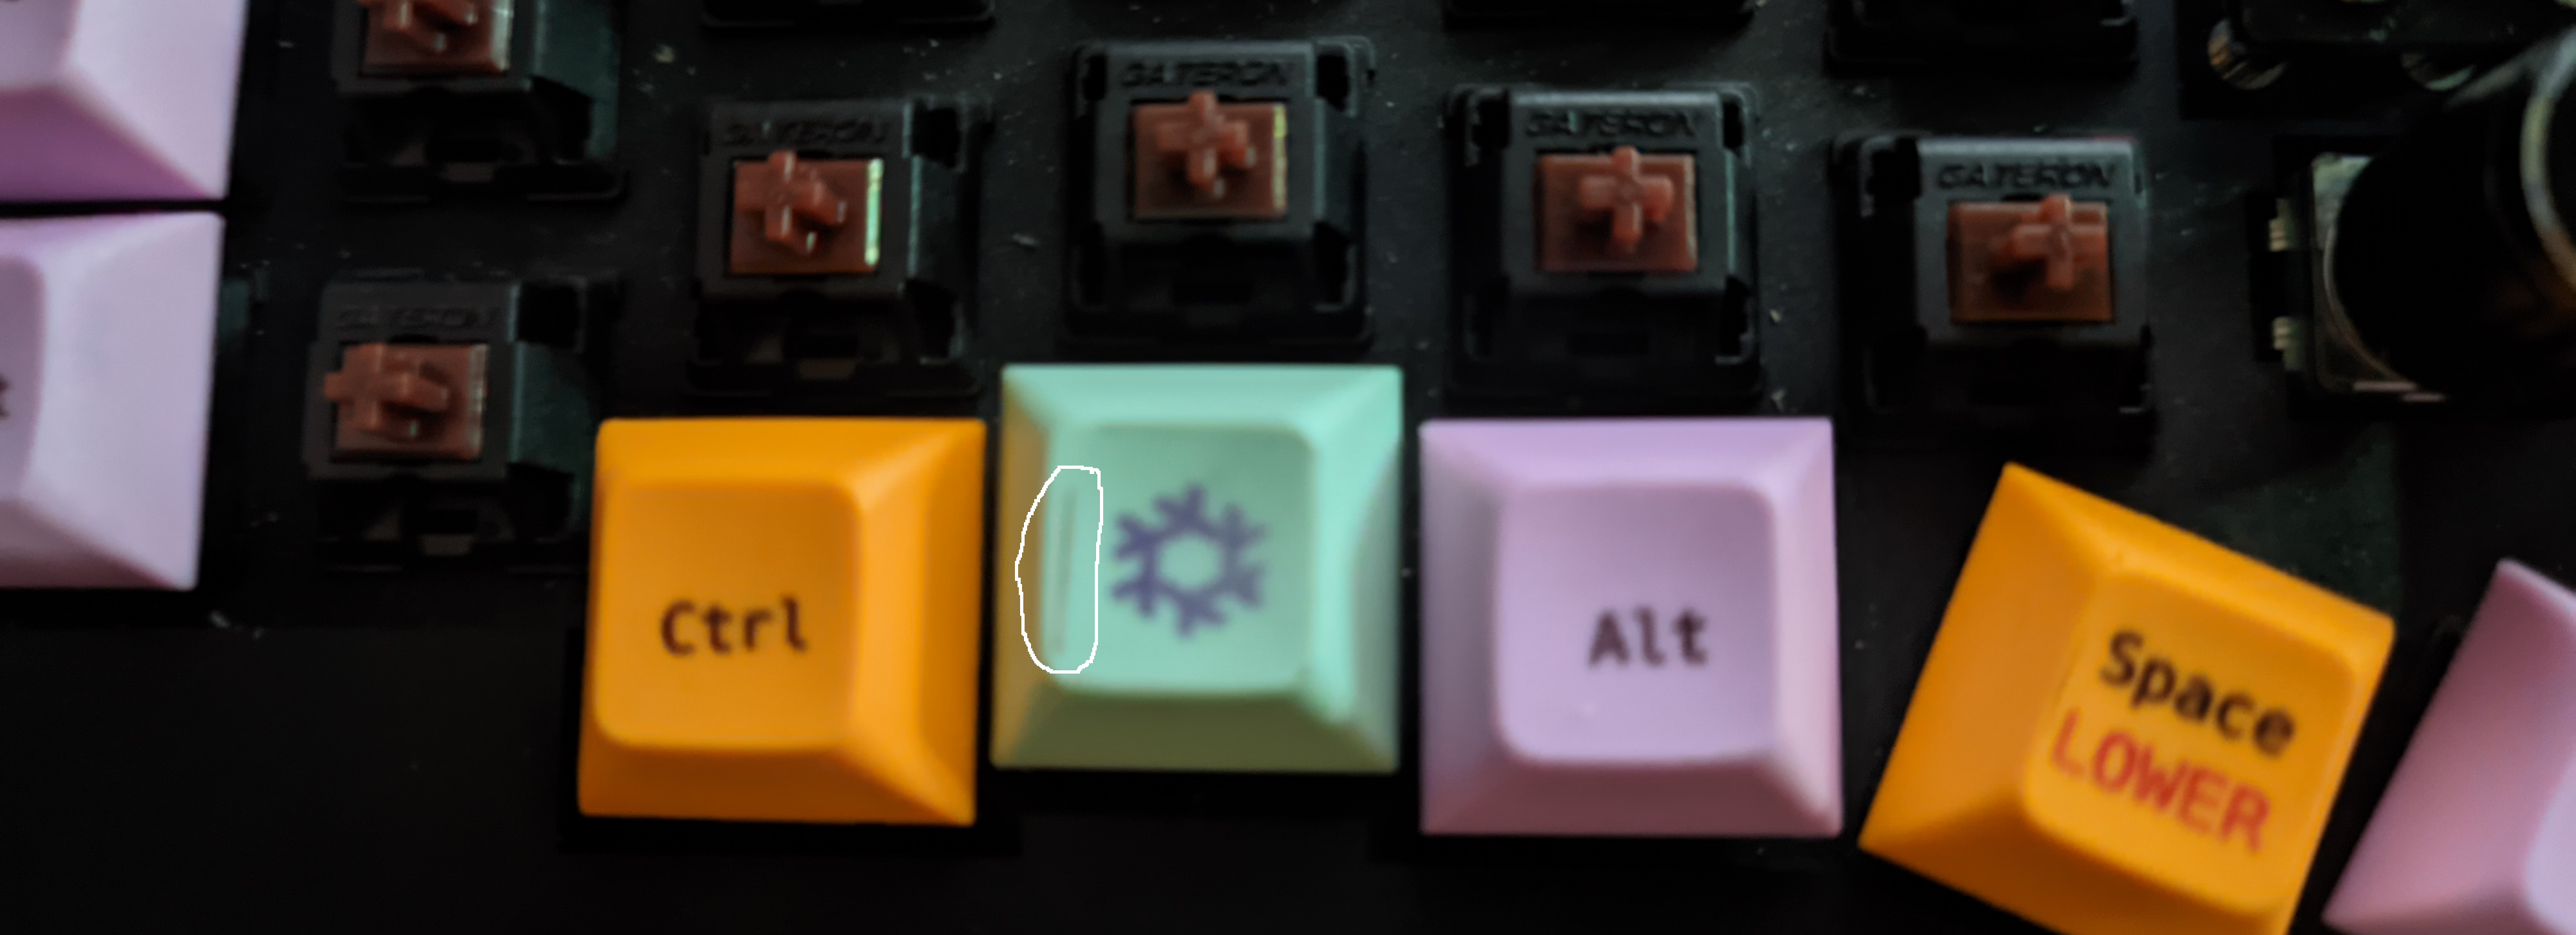
- Make sure to choose a color that’s darker than the color of your keycap. I was surprised to find that the blue color in my design looked black when transferred onto my orange keycap. While this mistake didn’t ruin my keycap, it’s something to keep in mind to ensure that your design looks the way you intend it to.
With your heat transfer paper printed and your keycaps ready, you’re now ready to move on to the next step of the process!
Cutting the paper
With your printed heat transfer paper in hand, it’s time to cut out the individual keycap legends. If you have a cutting machine, that’s great! Use it to cut out your designs with precision. However, if you don’t have a cutting machine, don’t worry - you can still achieve great results using a cutter or a pair of scissors.
To cut the paper, simply follow the outline of each design, making sure not to include the keycap outline that’s printed on the paper. This will ensure that your final keycaps look clean and professional.
One tip I learned while cutting the paper is to use a steady hand and a sharp blade to get a clean cut. It’s also important to take your time and make sure you don’t accidentally cut off any of the design.
With your keycap legends cut out, you’re one step closer to dye sublimating your keycaps!
Applying the heat transfer paper to the keycap
Now that your designs are cut out, it’s time to apply them to your blank PBT keycaps. To do this, place the heat transfer paper with the ink facing down onto the top of the keycap. Make sure you align it correctly, so that design is centered.
Once the paper is in position, use a heat resistance tape to hold it in place. I used masking tape, which worked well for me. Here’s a photo of how they look like:

It’s important to make sure that the paper is securely taped to the keycap, so that it doesn’t shift or move during the next step of the process. Once you’ve taped all of your keycaps, you’re ready to move on to the next steps!
Heat pressing the keycaps
With your heat transfer paper taped onto your keycaps, it’s time to press the dye ink into the PBT material using heat. This step is crucial to ensure that your legends are durable and long-lasting.
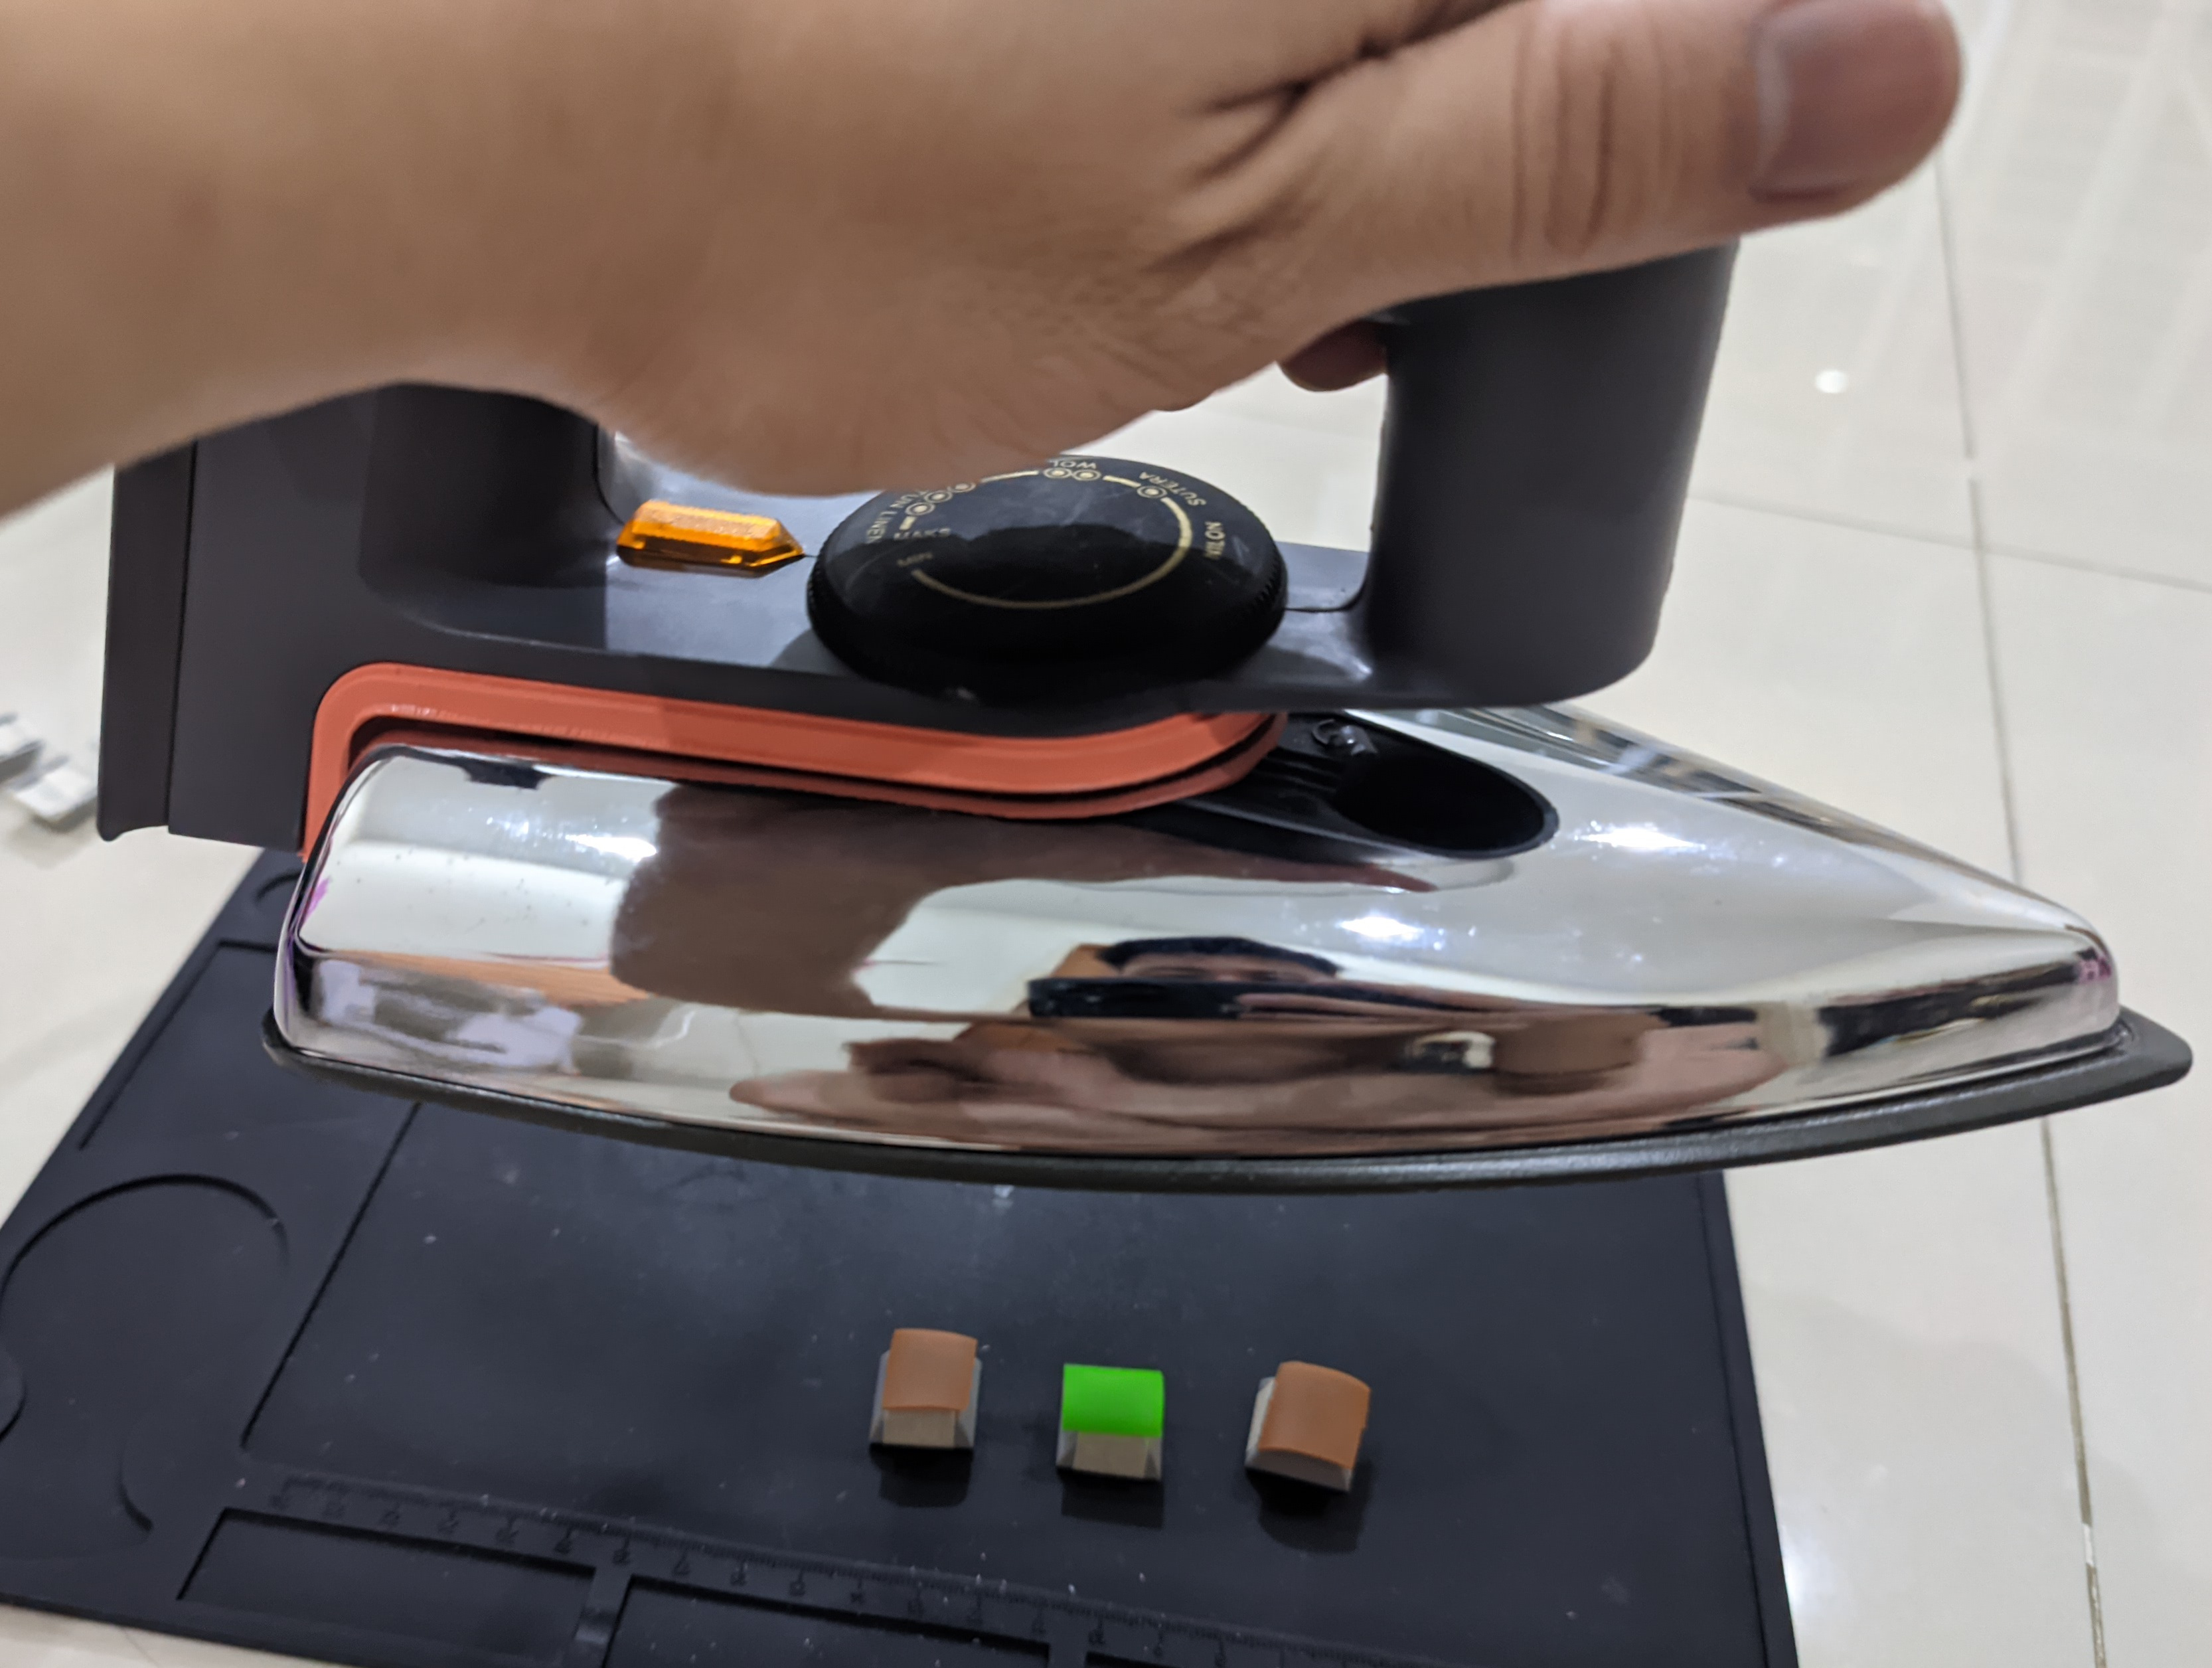
To get started, place a small silicone rubber on top of each keycaps. The size of the silicone may vary depending on the keycap surface - in my case, I found that using just a small silicone worked best.
Next, set your clothes iron to the maximum temperature (around 200°C) and let it heat up. Then, line up several keycaps on your heat-resistance mat, make sure that they are spaced apart evenly. I was able to press up to three keycaps at once, but you may be able to do more depending on the size of your iron and the layout of your workspace.
Once your keycaps are in place, start your timer for 90 seconds and begin pressing the clothes iron onto them. Apply even pressure accross the surface of the iron, and make sure that it touches every part of the keycap. After 90 seconds, carefully lift the iron off the keycaps and set it aside.
Here’s a photo of me heat pressing my keycaps:
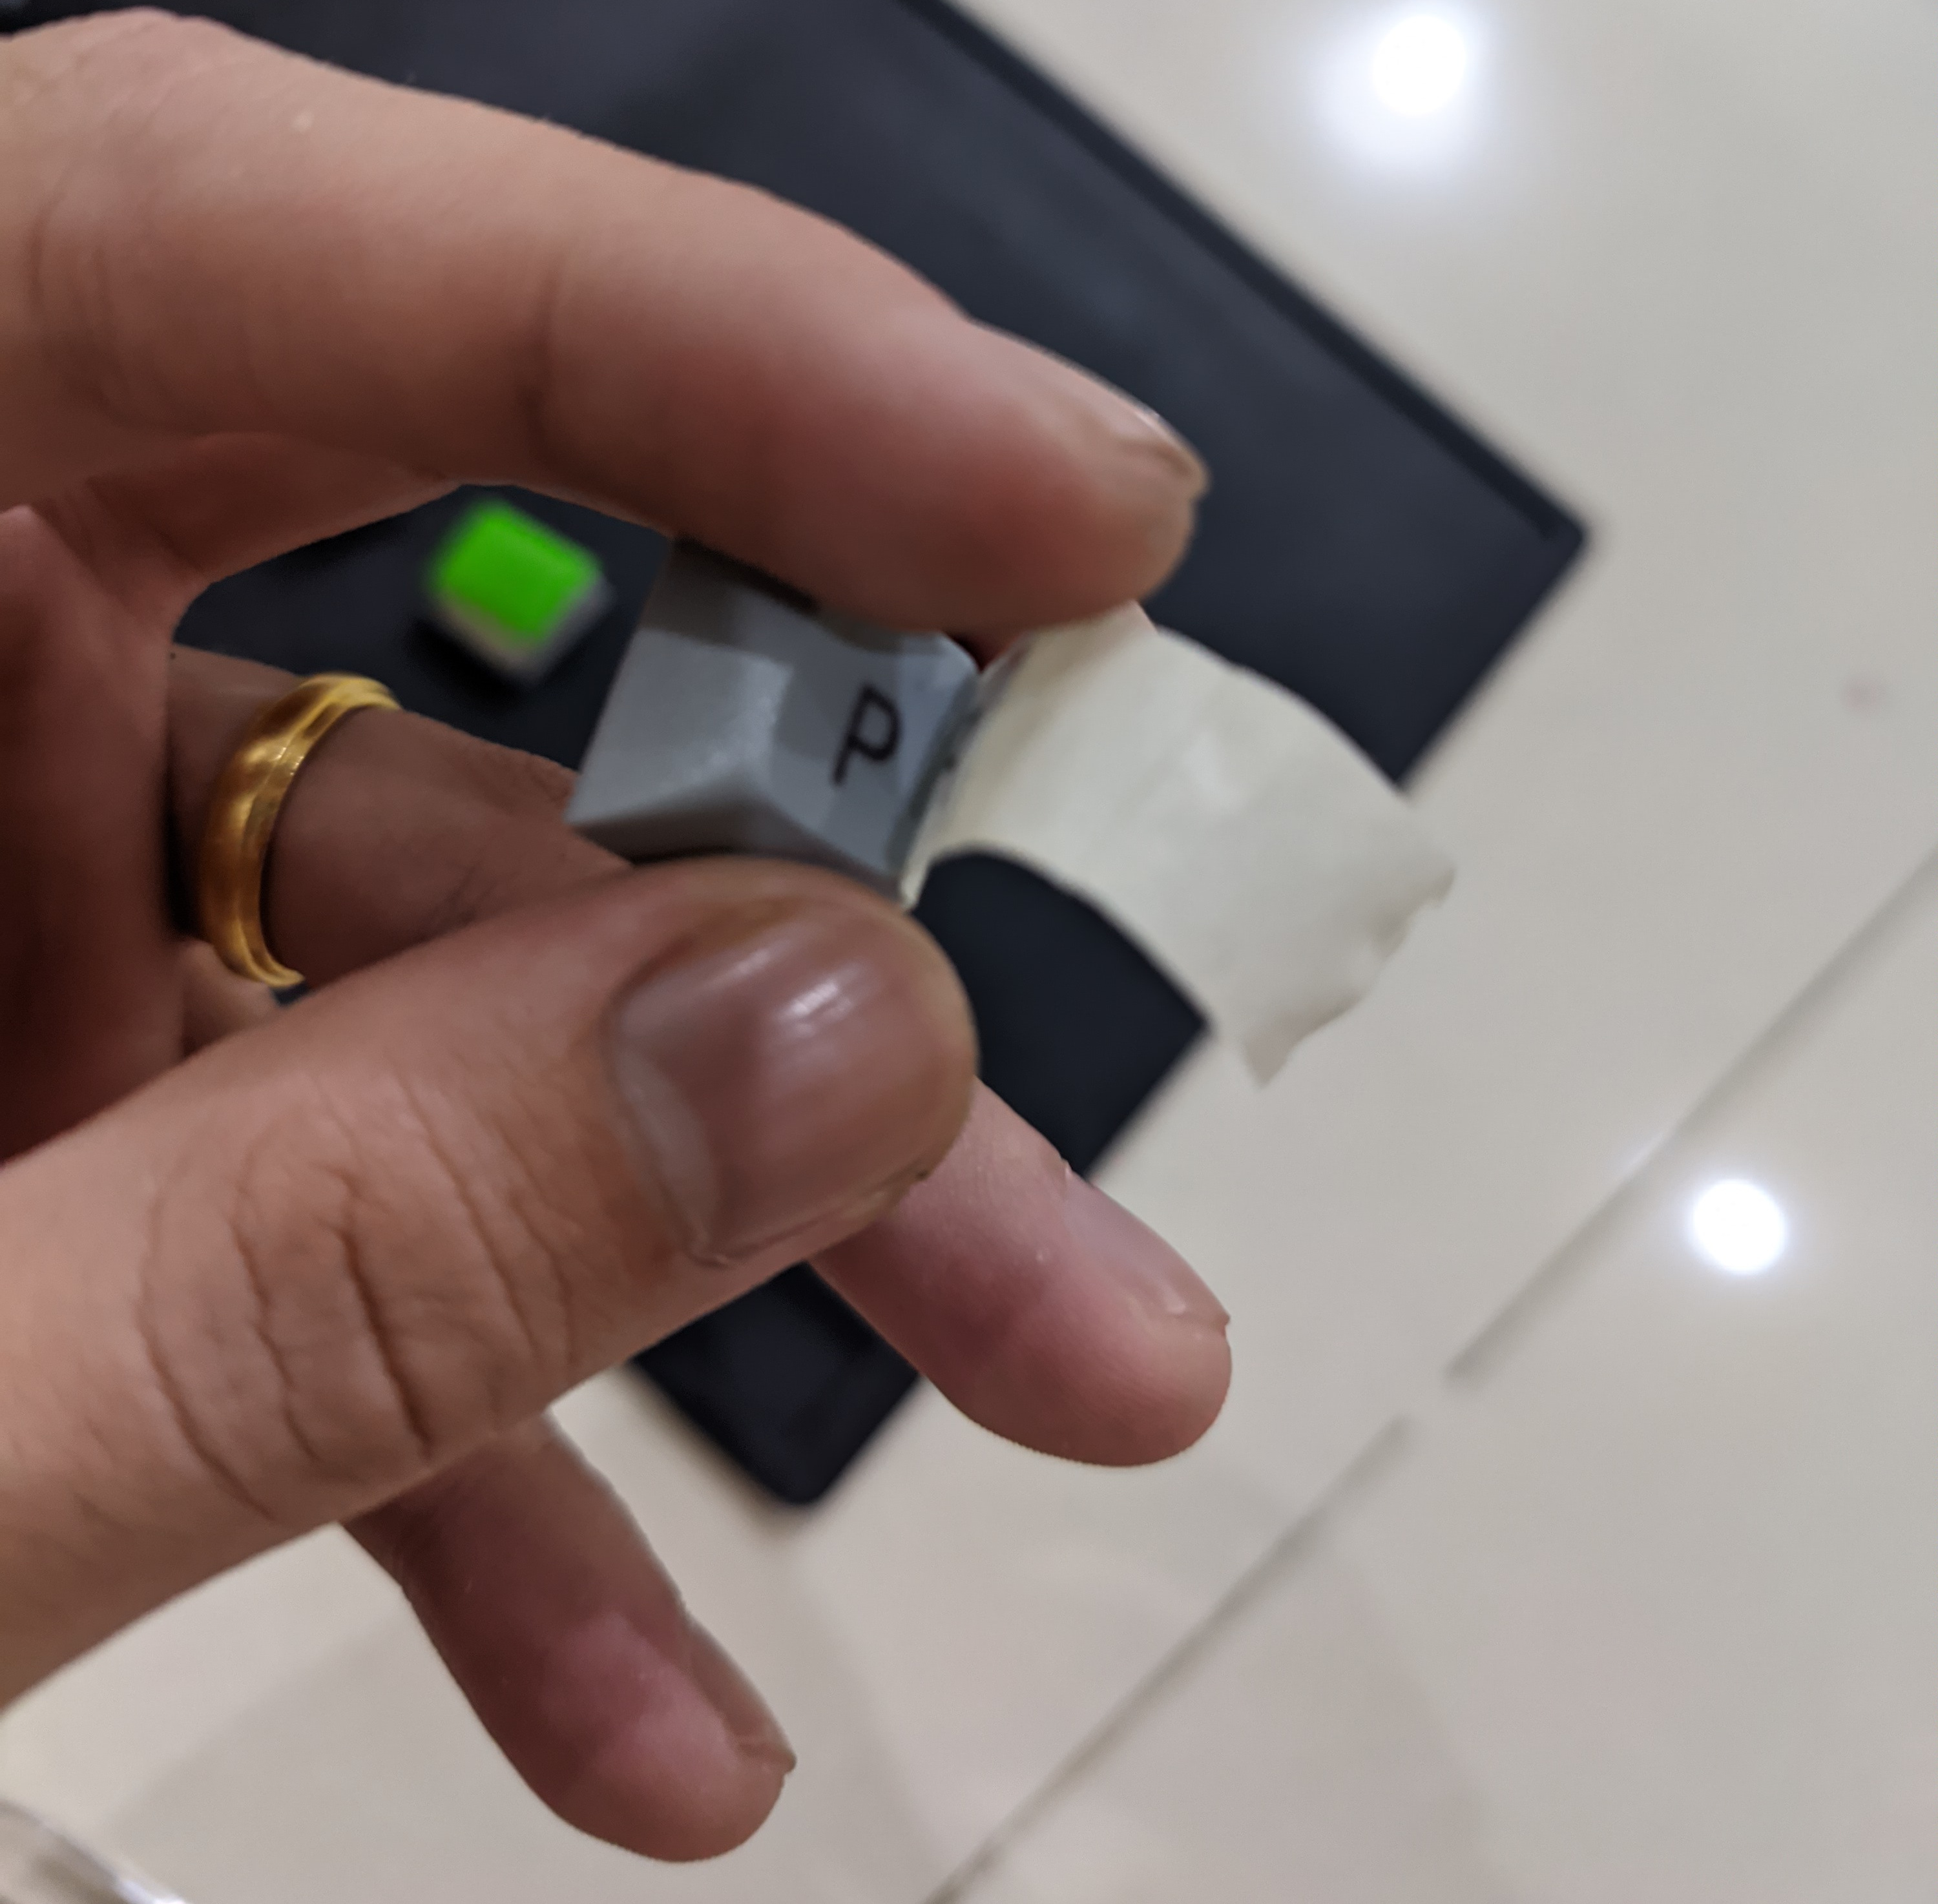
After the timer stops, use a small tweezer to carefully open one side of the tape and peek inside. Check to see if the dye ink has transferred fully onto the keycap- if the result isn’t good, you can tape it back and redo the process.
Repeat this process for all of your keycaps, and then let them cool down completely before removing the tape. Once you’ve finished heat pressing, you’ll be able to enjoy your custom, dyed PBT keycaps!
Conclusion
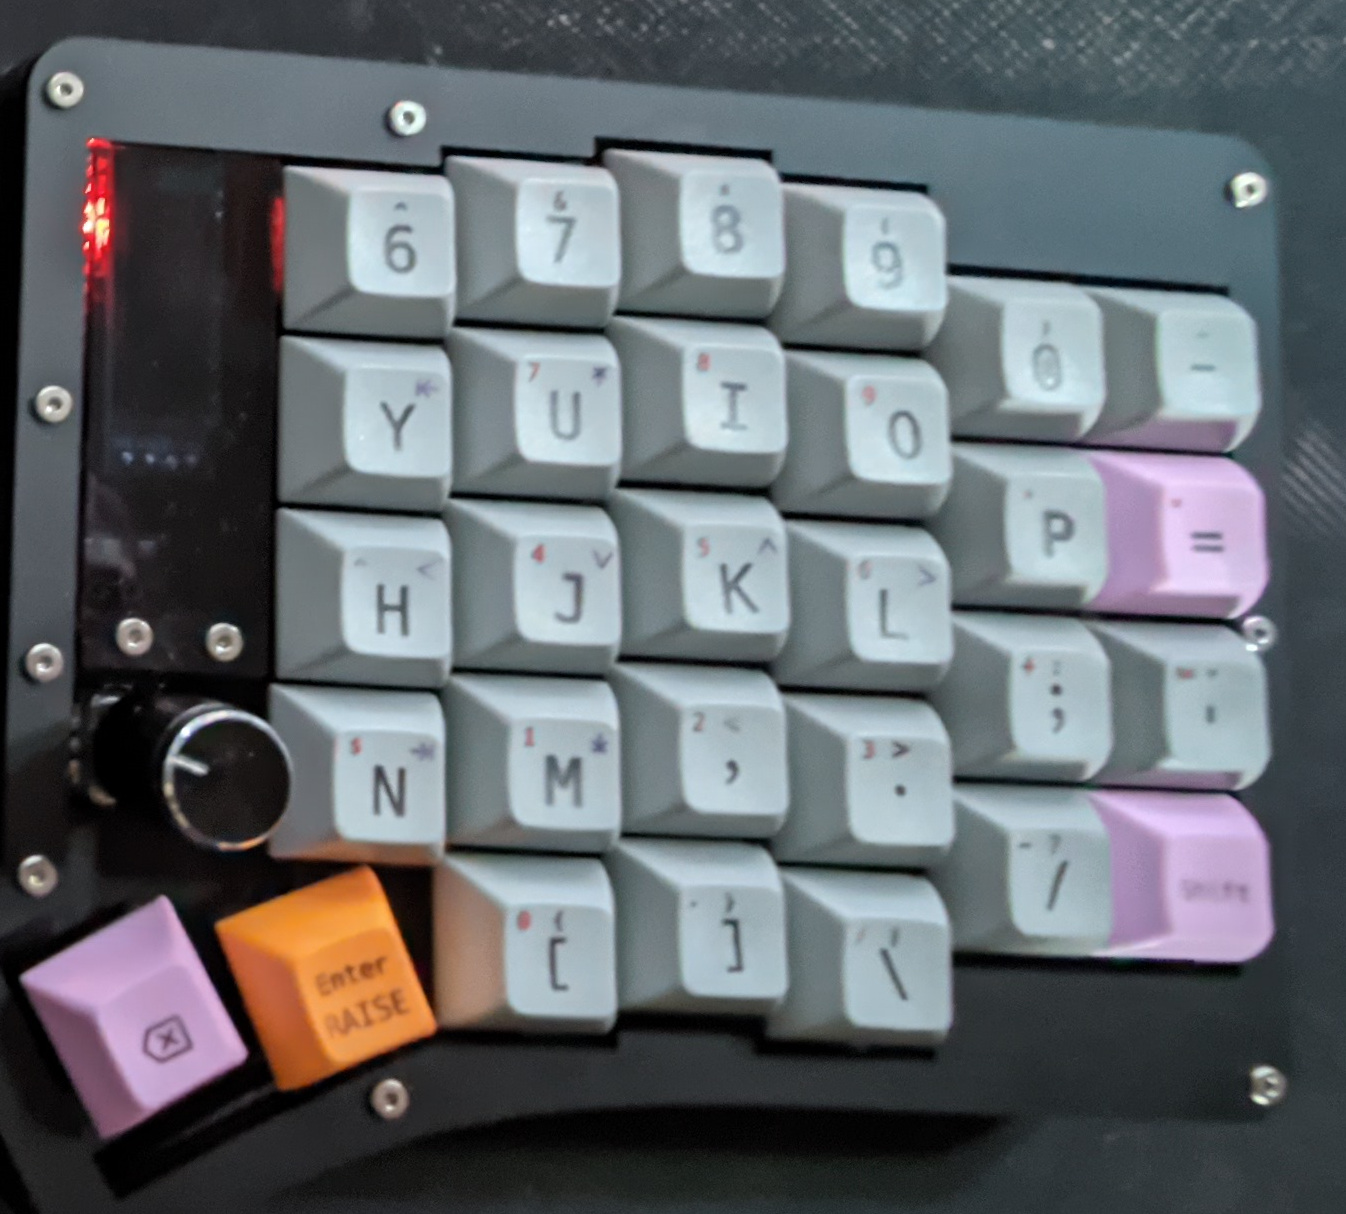
I spent 4 hours to do dye-sublimate all the keycap on my Sofle keyboard (58 keycaps to be exact). The result is not perfect, but I’m quite satisfied with it. The thing about doing DIY stuffs like this is you’ll get the different kind of satisfaction from buying the finished products. Here’s the close up shot of my finished keycaps:
If I were to redo this, I’ll be extra careful with cutting the paper and lining it into the keycaps. There are a lot of them being misaligned and uneven that I wish I can redo them.
Anyway, that’s how I dye-sublimated my PBT keycaps at home. If you have any suggestions for me, that’ll be very awesome. Thank you for reading this post and I hope you enjoy it.
I also want to shoutout this reddit post which is where my inspiration coming from.
If you want to buy me a coffee: