My DIY Split Keyboard Journey
Have you ever yearned for a typing experience that doesn’t leave your hands strained and your posture suffering? Well, I’ve been there too and it’s no fun at all. I embarked on an exhilarating and DIY-filled journey to find the holy grail of my very own split keyboard. It’s been a rollercoaster ride of inspiration, trial and error, and a whole lot of customization. This adventure has forever changed the way I type, improving not just my productivity, but also my overal well-being. Let’s dive into the captivating world of my DIY split keyboard journey.
The motivation
Motivation is a powerful driving force, especially when it comes to improving our daily experience. I, too, found myself captivated by the allure of split keyboards, witnessing others proudly flaunting their shiny, ergonomic creations. The curiosity grew within me, urging me to explore just how much it could enhance my overall comfort when typing. In theory, the ability to stretch out my hands while typing seemed like a revelation, a far cry from the cramped and constricted movements I had grown accustomed to.
However, as I delved deeper, I discovered an overwhelming array of split keyboards, each with its own unique design, often featuring unfamiliar thumb keys. The decision making process became a daunting task, but the thought of never knowing the benefits without taking the plunge propelled me forward. With a determined spirit, I made up my mind to embark on this uncharted territory, ready to embrace the unknown and find out firsthand just how much a split keyboard could revolutionize my typing experience.
Going all in or not
Navigating the transition to a split keyboard posed an interesting dilemma for me, considering the two different machines I interacted daily - one at home and another at my workplace. I pondered the best approach to integrate this new keyboard into my routine without causing any significant disruptions to my productivity.
The thought of simultaneously switching keyboards on both machines seemed like a considerable risk, as it could potentially slow down my work progress. To mitigate this concern, I devised a plan: I would begin by experimenting with the split keyboard at home, gradually acclimating myself to its layout and reaping the benefits of improved comfort. Once I felt confident and proficient with the new keyboard, I would then proceed to make the transition at my workplace, ensuring a seamless integration without compromising the efficiency of my daily tasks.
This strategic approach would allow me to strike a balance between embracing the ergonomic benefits of a split keyboard and maintaining a smooth workflow throughout the adaptation process.
My keyboard of choice
As I delved deeper into the fascinating world of split keyboards, I found myself scrolling through countless posts on the reowned subreddit, /r/ErgoMechBoards, soaking in the wisdom and experiences shared by the community. Among the plethora of options available, two keyboards caught my eye and ignited my curiosity: the Sofle and the Corne. These keyboards has gained popularity for their ergonomic design and widespread availability, making them accessible choices, especially for those willing to embark on the rewarding journey of building their own keyboards.
The primary distinguishing factor between the two lay in the number of keys they offered. The Sofle boasted four rows with five additional thumb keys, while the Corne offered three rows with three extra thumb keys.
After careful consideration, I found myself leaning towards the Sofle, primarily because, on my first foray into the world of split keyboards, I felt a dense of trepidation about diving too deep into a more extreme layout. It seemed prudent to take a gradual approach, allowing myself to acclimate to the new layout and then venture further into uncharted territory once I had gained confidence and familiarity with the Sofle keyboard.
Getting the keyboards
For my first keyboard, I opted for a pre-made kit instead of diving straight into heavy soldering. Being a novice in that domain, I wanted to ensure a smooth and hassle-free initial experience. I purchased a Sofle prebuilt kit with a sleek black acrylic stacked case, which cost me IDR 1.300.000 (approximately USD 88 at the time of writing). To complement the keyboard, I chose Gateron MX Brown switches for the regular keys and MX Black switches for the thumb keys, striking a balance between tactile feedback and a smooth typing experience. I must say, the end result was quite satisfying. Take a look at the picture below to see the finished build.
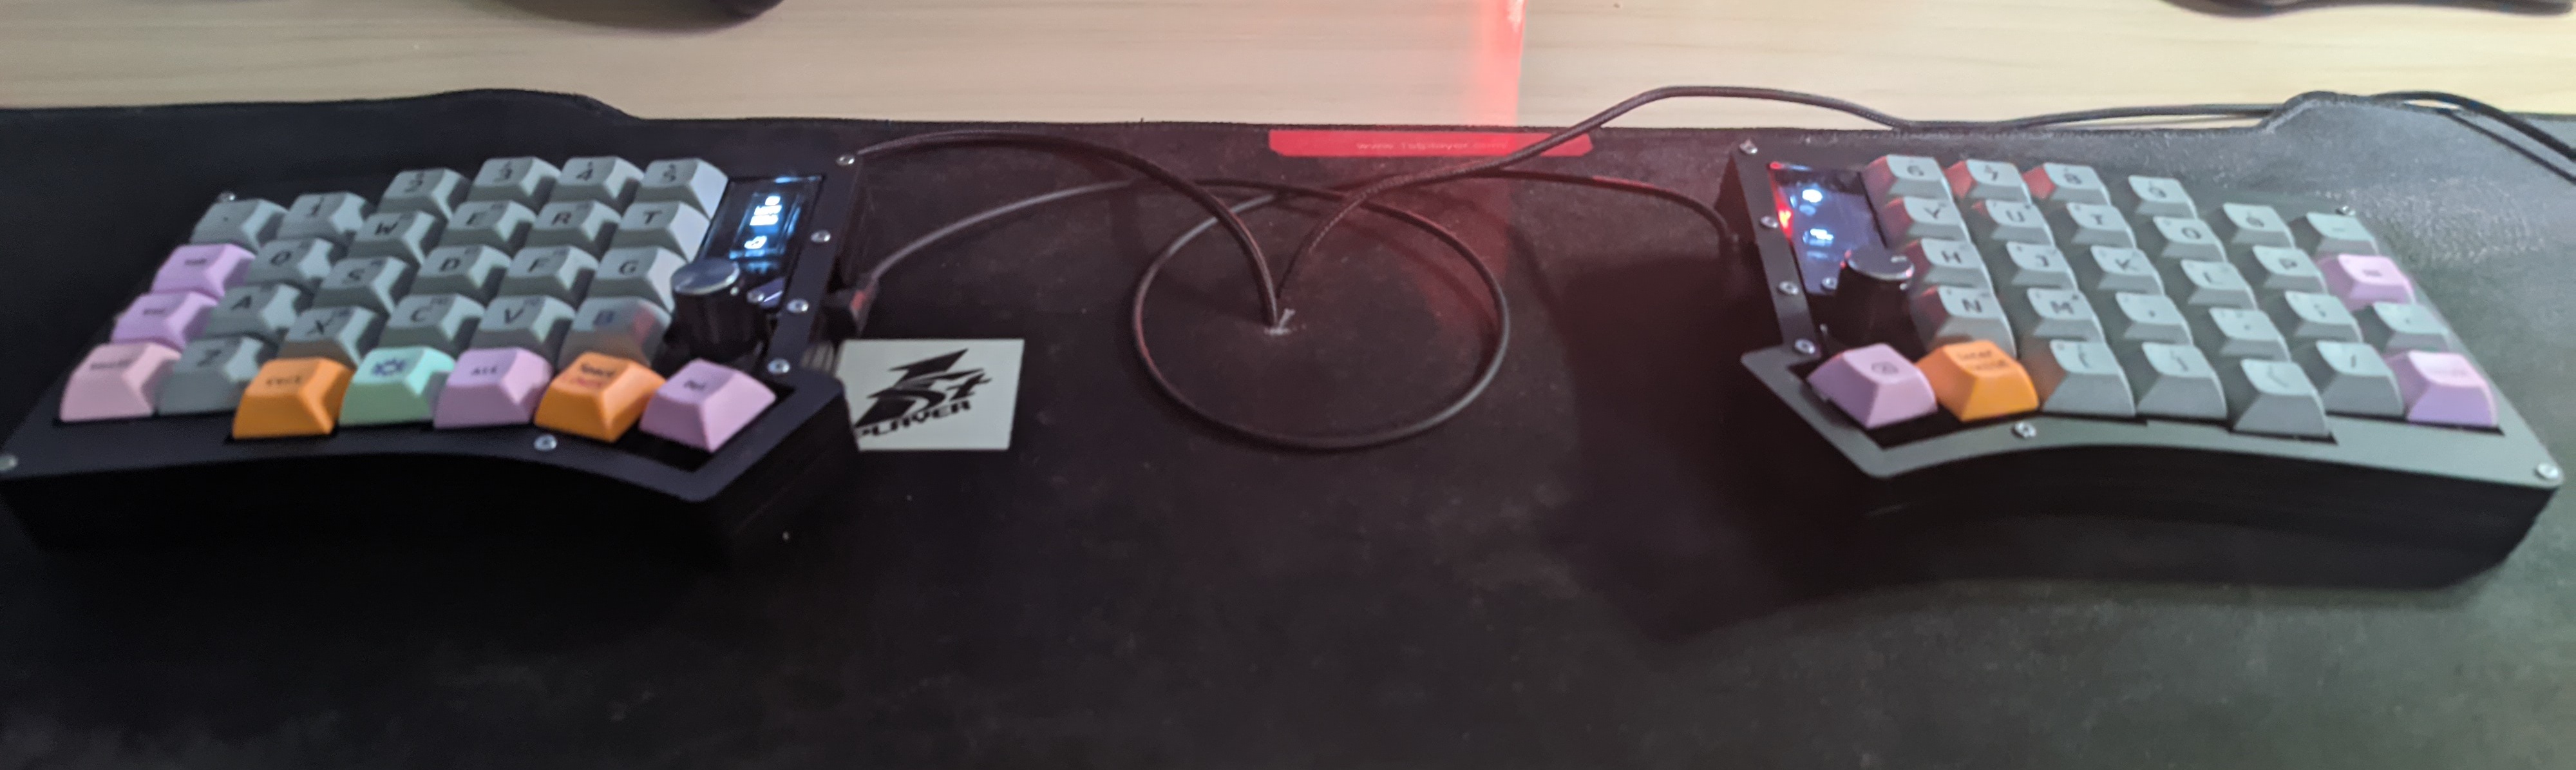
P.S.: If you’re curious about how I achieved the keycaps’ legends, I documented the process in a separate post Feel free to check it out!
For my second build, I took a more adventurous route and decided to tackle the assembly myself after investing time in reading and watching numerous soldering tutorials. I procured the necessary materials from the same seller, but this time, I opted for a white case to add a touch of variety. This time, I chose a combination of MX Red and Yellow switches instead. With careful attention and a few minor hurdles to overcome, the build turned out to be a success. The sense of accomplishment I derived from building it from scratch was truly fulfilling. Feast your eyes on the result in the image below.
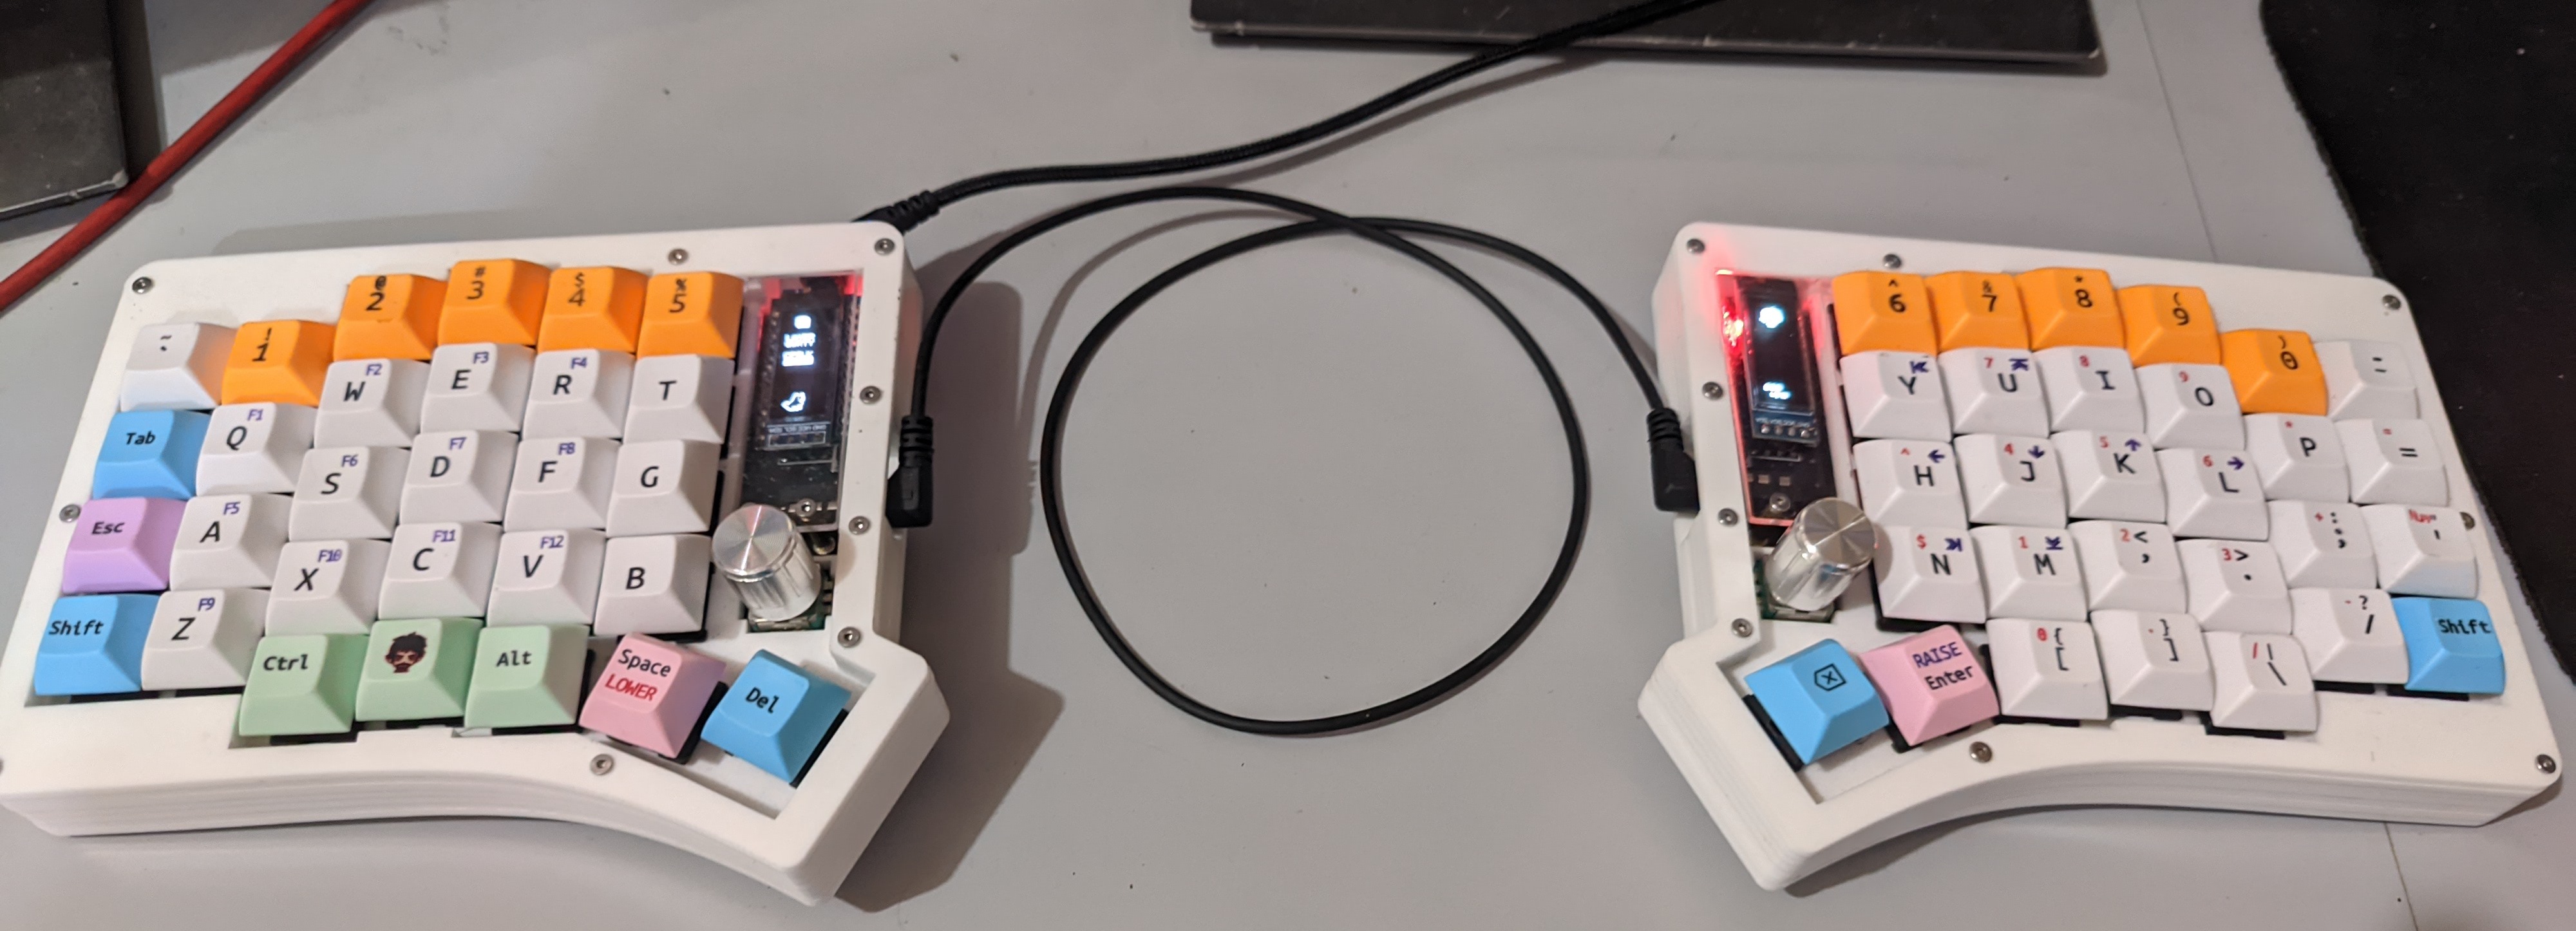
Building this second keyboard allowed me to explore a different dimension of satisfaction - one that arises from the process of creating something unique and tailored to my preferences. It was a delightful experience that further fueled my passion for DIY split keyboards.
The firmware side of things
Serving as the powerhouse for my keyboards, I utilized Micro USB ProMicro controllers. Flashing them with the versatile and customizable qmk, I gained full control over the functionality and behavior of my keyboards. For those interested, you can explore my keymaps on my GitHub fork, where I plan to delve into the firmware aspect in more detail in my future article. There’s a lot to uncover and share about this fascinating process.
As a little teaser, let me give you a glimpse of the OLED display on my Sofle keyboard. It adds a touch of visual delight to the overall experience and provides useful information at a glance.
The upside
After immersing myself in the world of split keyboards for a couple of months, I can confidently say that I have no regrets. Admittedly, the first two weeks were a bit brutal. Efficiency seemed like a distant dream as I continuously found myself pressing the wrong keys. However, with persistence and determination, I steadily improved. After just two weeks of dedicated practice, I managed to reclaim my average typing speed of 65 words per minute.
The most significant improvement I’ve experienced since switching to a split keyboard is the newfound comfort in my typing. I can now spread out the keyboard, relieving tension in my shoulders and allowing for a more natural posture. It’s truly a game-changer.
Another aspect that has dramatically improved is my touch typing.
Previously, I found myself constantly lifting my hands to reach for keys like Esc, Backspace, Enter, arrows, and number keys.
But now, thanks to the split keyboard layout, these keys are within reach of my thumbs or conveniently located on another layer while my hands comfortably rest on the home row.
Need to press Enter?
It’s just a thumb press away.
Want to navigate left?
Simply tap the h key in the upper layer, accessible with the same right thumb key.
As a devoted Vim practitioner, I can finally bid farewell to my workaround of using “ii” to exit Insert mode since the Esc key now resides on my home row.
Additionally, I’ve happily say goodbye to Tridactyl, the browser extension for Vim-like navigation, as the arrow keys have found a new home right on my home row.
The satisfaction derived from these changes is truly indescribable.
Let’s take a moment to appreciate the underrated power of thumb keys. The thumbs, being the strongest finger of all, has been underutilized, relegated to the sole duty of pressing the space bar for far too long. While I’m still refining my thumb movements, I am confident that with time, they will become more fluid and effortless.
My journey into the world of split keyboards has yielded remarkable results. I type with unparalleled comfort, my posture has improved, and my touch typing has reached new heights. The convenience of having essential keys within reach of my thumbs and on the home row has revolutionized my workflow, liberating me from previously ingrained habits and workarounds. It’s safe to say that I’ve become a fervent advocate for the immense benefits of split keyboards, and I eagerly anticipate further improvement and exploration in this exciting realm.
The downside
While my journey into the realm of split keyboards has been overwhelmingly positive, it’s important to acknowledge that no transition is without its drawbacks. There is one aspect I occasionally find myself missing from using a conventional keyboard.
With my previous full-sized keyboard, I had the convenience of resting my right hand on the mouse or the table while utilizing the pinky finger of my left hand to effortlessly press a button. This was especially convenient when I wanted to take a leisurely approach or browse the web. Unfortunately, with the split keyboard layout, this particular comfort is not as readily available. Many keys are now located on separate layers, requiring the simultaneous pressing of two keys, sometimes from different sides of the keyboard. As a result, the seamless one-handed operation I enjoyed previously is not as easily achievable.
While this is a minor inconvenience in the grand scheme of things, it’s worth noting that every change comes with a trade-off. In the case of split keyboards, the benefits of improved ergonomics and comfort may necessitate a slight adjustment in certain usage scenarios. However, it’s important to keep in mind that with time and practice, these challenges can be overcome, and the overall advantages of split keyboards far outweigh this minor downside.
Ultimately, it’s a matter of weighing the pros and cons and finding the right balance that suits your individual needs and preferences.
Closing
As I reflect upon my DIY split keyboard journey, it’s remarkable to realize that I have already been using my beloved Sofle keyboards for solid three months. At this point, typing on this ergonomic marvel has become second nature to me, and I can confidently say that I’ve fully embraced the comfort and efficiency it provides. The transition, though initially challenging, has been a smooth one, and I now find myself effortlessly typing away without any issues.
While I’m thoroughly satisfied with my current setup, I can’t help but envision future possibilities. As I continue to explore the vast world of split keyboards, I can foresee myself venturing into new territory with keyboards featuring fewer rows. The experience of seamlessly switching between layers using the thumb keys has been incredibly enjoyable, and I’m beginning to feel that the fourth row may be unnecessary for my specific needs. Perhaps starting with a Corne keyboard from the beginning would have been a better fit. Nevertheless, this realization only adds to the excitement of future projects and the ongoing evolution of my typing experience.
To those who have accompanied me on this journey by reading this article, I extend my heartfelt gratitude. Your support and engagement mean the world to me. If you have any thoughts or insights you’d like to share, please don’t hesitate to leave a comment below. I would be thrilled to continue the conversation and exchange ideas with fellow keyboard enthusiasts and comfort seekers.
Thank you once again for joining me, and here’s to an exciting future filled with endless possibilities in the captivating world of DIY split keyboard!
If you want to buy me a coffee: